Sicura Console provides a robust backend with a thorough API that allows for easy access and manipulation of any data used in the Console. This page gives an overview of how to access and make use of the available APIs.
In order to allow the console to be used in a Kubernetes or Scaled environment. We’ve provided healthcheck endpoints for quick checking of basic console functionality.
GET /health
  Status: 200
  Body: 'SicuraConsole OK'
GET /readiness
Statuses: 200 ready, 503 not ready, or 404 not found
{
  "all_ready": "ok",
  "checks": {
    "core_ready": "ok",
    "db_ready": "ok",
    "system_session_ready": "ok",
    "all_plugins_loaded": "ok",
    "all_workers_started": "ok"
  }
}
«««< Updated upstream
In order to build any tooling that may interface with the console, you’ll need to use the provided REST API. All API definitions can be accessed from the Swagger API reference which is easily found by clicking the user menu at the bottom left corner of the toolbar and selecting API Reference.
=======
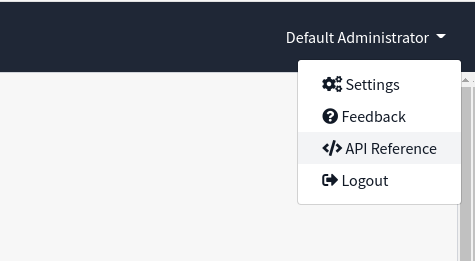
In order to build any tooling that may interface with the console, you’ll need to use the the provided REST API. All API definitions can be accessed from the API reference which is easily found by clicking the user menu at the top-right corner of the toolbar and selecting API Reference
Stashed changes
After clicking, the OpenAPI documentation will appear with specific access based on the user logged into the console.
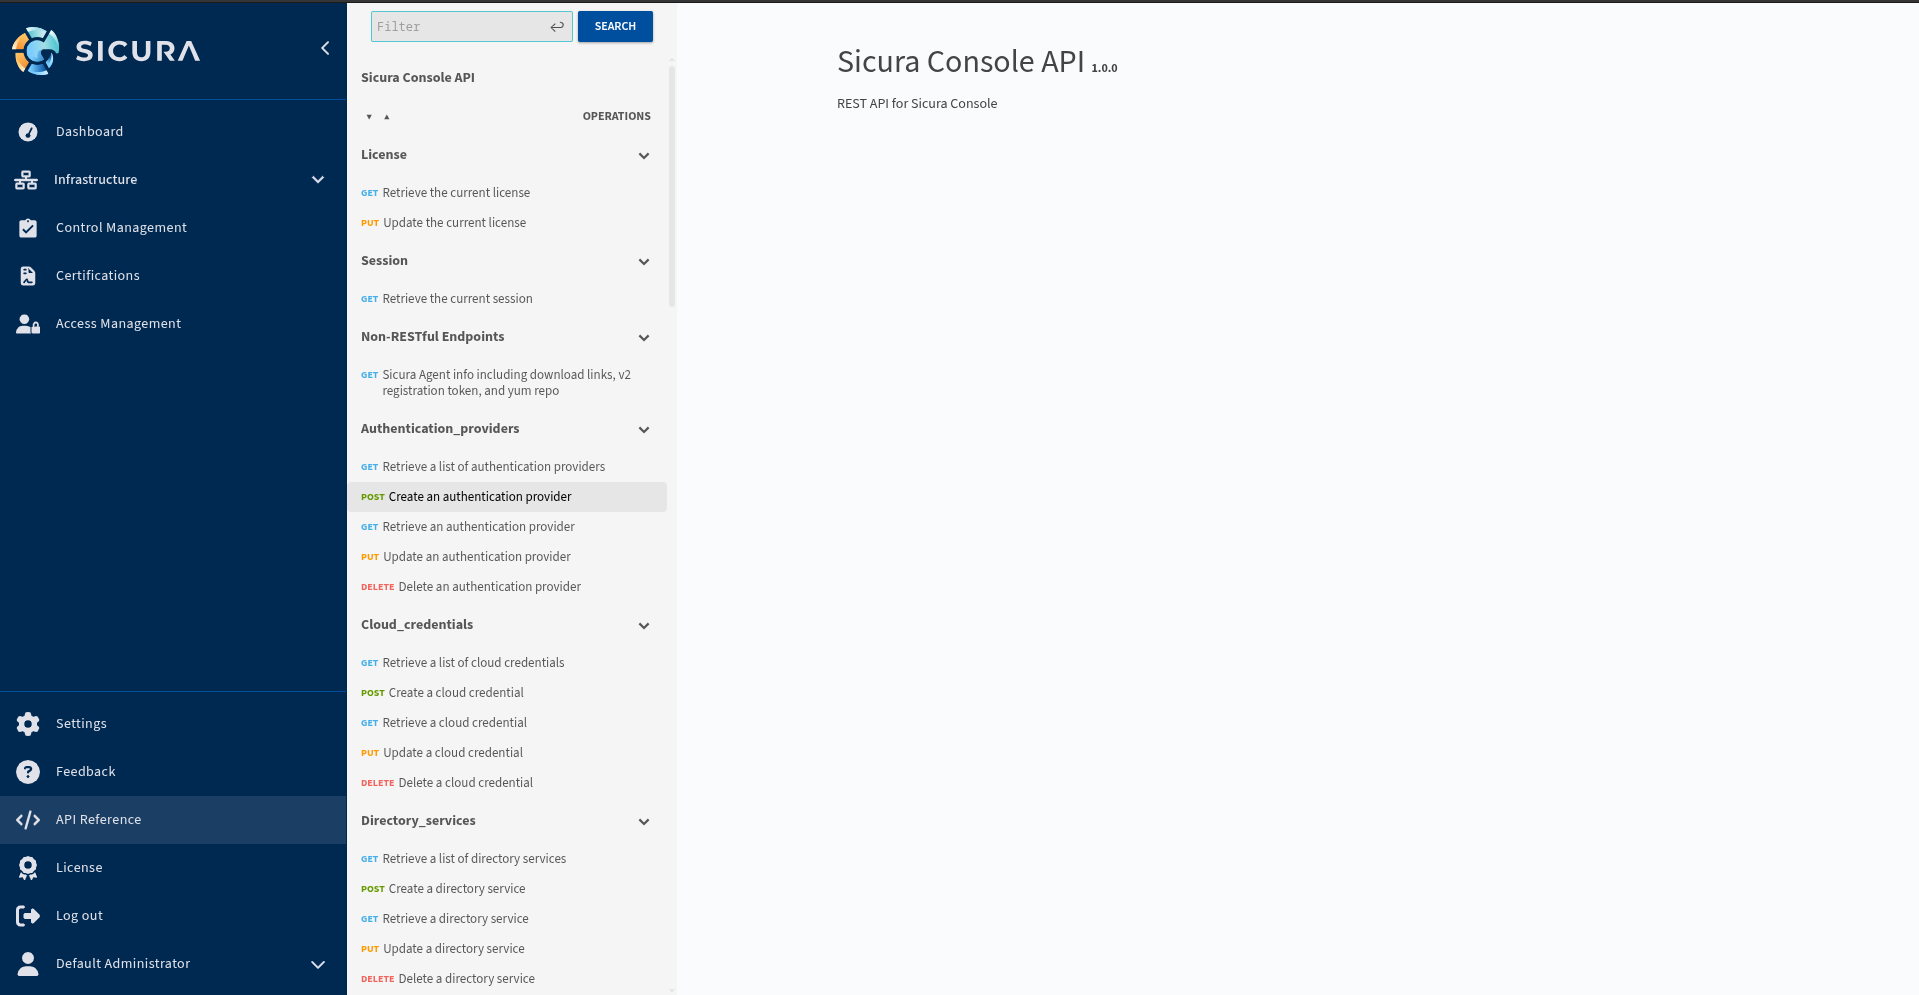
Provided is a list of every API Collection that is defined in our REST framework. By clicking one it will show you ALL of the operations that can be made on that collection. For this example we’ll show the most complex API: infrastructure/v1/nodes

Start by selecting the first GET option. This is for the entire collection as opposed to the later GET which is specifically used only if you know the ID of a particular indevidual object you want to grab.
Start by clicking Try it out
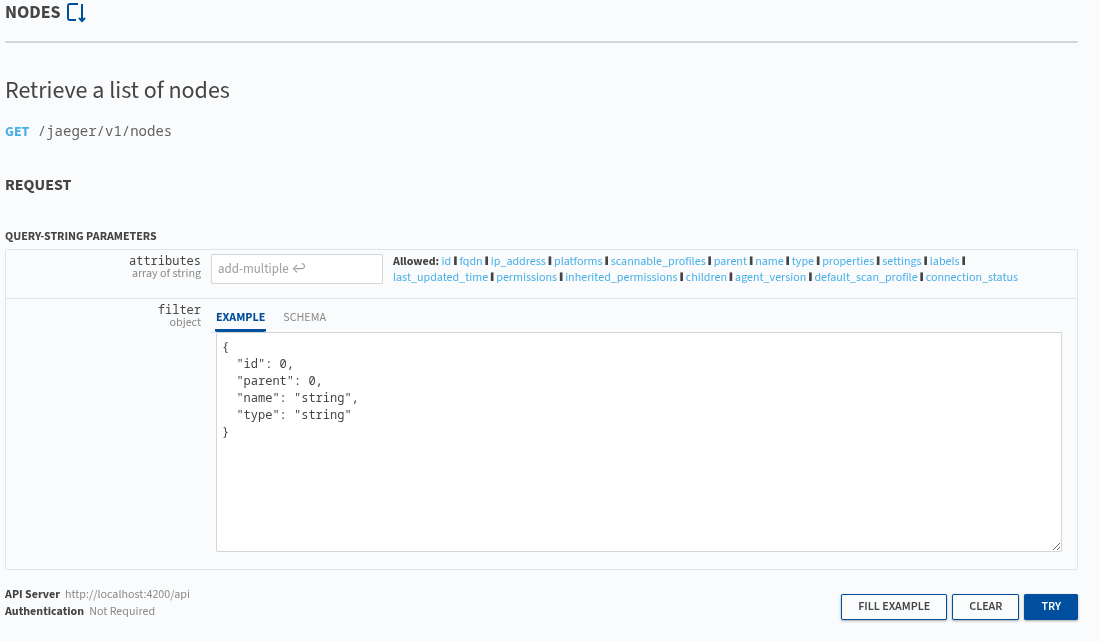
This above screen has 2 sections to focus on
This is a list of all attributes associated with a particular object or collection (node or nodes in this example). You can limit the data returned by selecting only the attributes you want.
Note: Most APIs have a set of default attribues that will return regardless of the user’s selection in the attribute field.
When querying a large collection, the filter option can be useful as it allows you to narrow down the returned list of objects in that collection. All attributes and their specified datatype are listed for you in the filter initially. Delete any attributes you do not want to filter by and change the datatype to the data you’re looking for on any attributes you do want to filter by. For example, to return only RHEL 7 nodes you would modify the filter to be "platform": "cpe:/o:redhat:enterprise_linux:9" and delete everything else from the filter. An empty response [] will be returned if there are no matches for your filter.
Once selections have been made, click try to get the response. An example CURL with your selections is provided, for easy copy-paste into your tool.
Sicura
© copyright 2022