Automatic compliance enforcement is one of the industry leading features the Sicura Console offers. Getting set up for enforcement is easy and can be accomplished in a few steps.
Create a name resolution entry (i.e. DNS) for sicura-console-collector with the IP address of the Console. Clients will use this entry to automatically discover and register with the Console.
From the client node, you can download the Agent installer directly from the Console server at
http(s)://sicura-console-collector:(port)/client/windows/sicura-agent-latest.exehttp(s)://sicura-console-collector:(port)/client/el/sicura-agent-latest.rpmYou can also download them from the Console UI on the Infrastructure > Management page. Click on Agent Downloads at the top of the page for download links and an optional YUM repo file to use on Linux clients.
The Sicura Agent can be started either in the foreground or in the background.
sicura-agent for foreground executionsystemctl start sicura-agent to start the agent as a service (Windows starts the agent as a service by default)In the Console UI, go to the Infrastructure > Management page. Click on the Accept button on the new client’s row.
From the Console UI, trigger a scan by clicking the Scan dropdown and selecting a scan profile.
Verify that the scan completes with no errors and successfully submits its results to the console.
A single rule can be fixed by selecting the rule name in the results. This will open the Scan Drawer
Navigate to the Remediation tab, and click the Remediate button.
Once the changes are loaded, review what actions will be performed on the system.
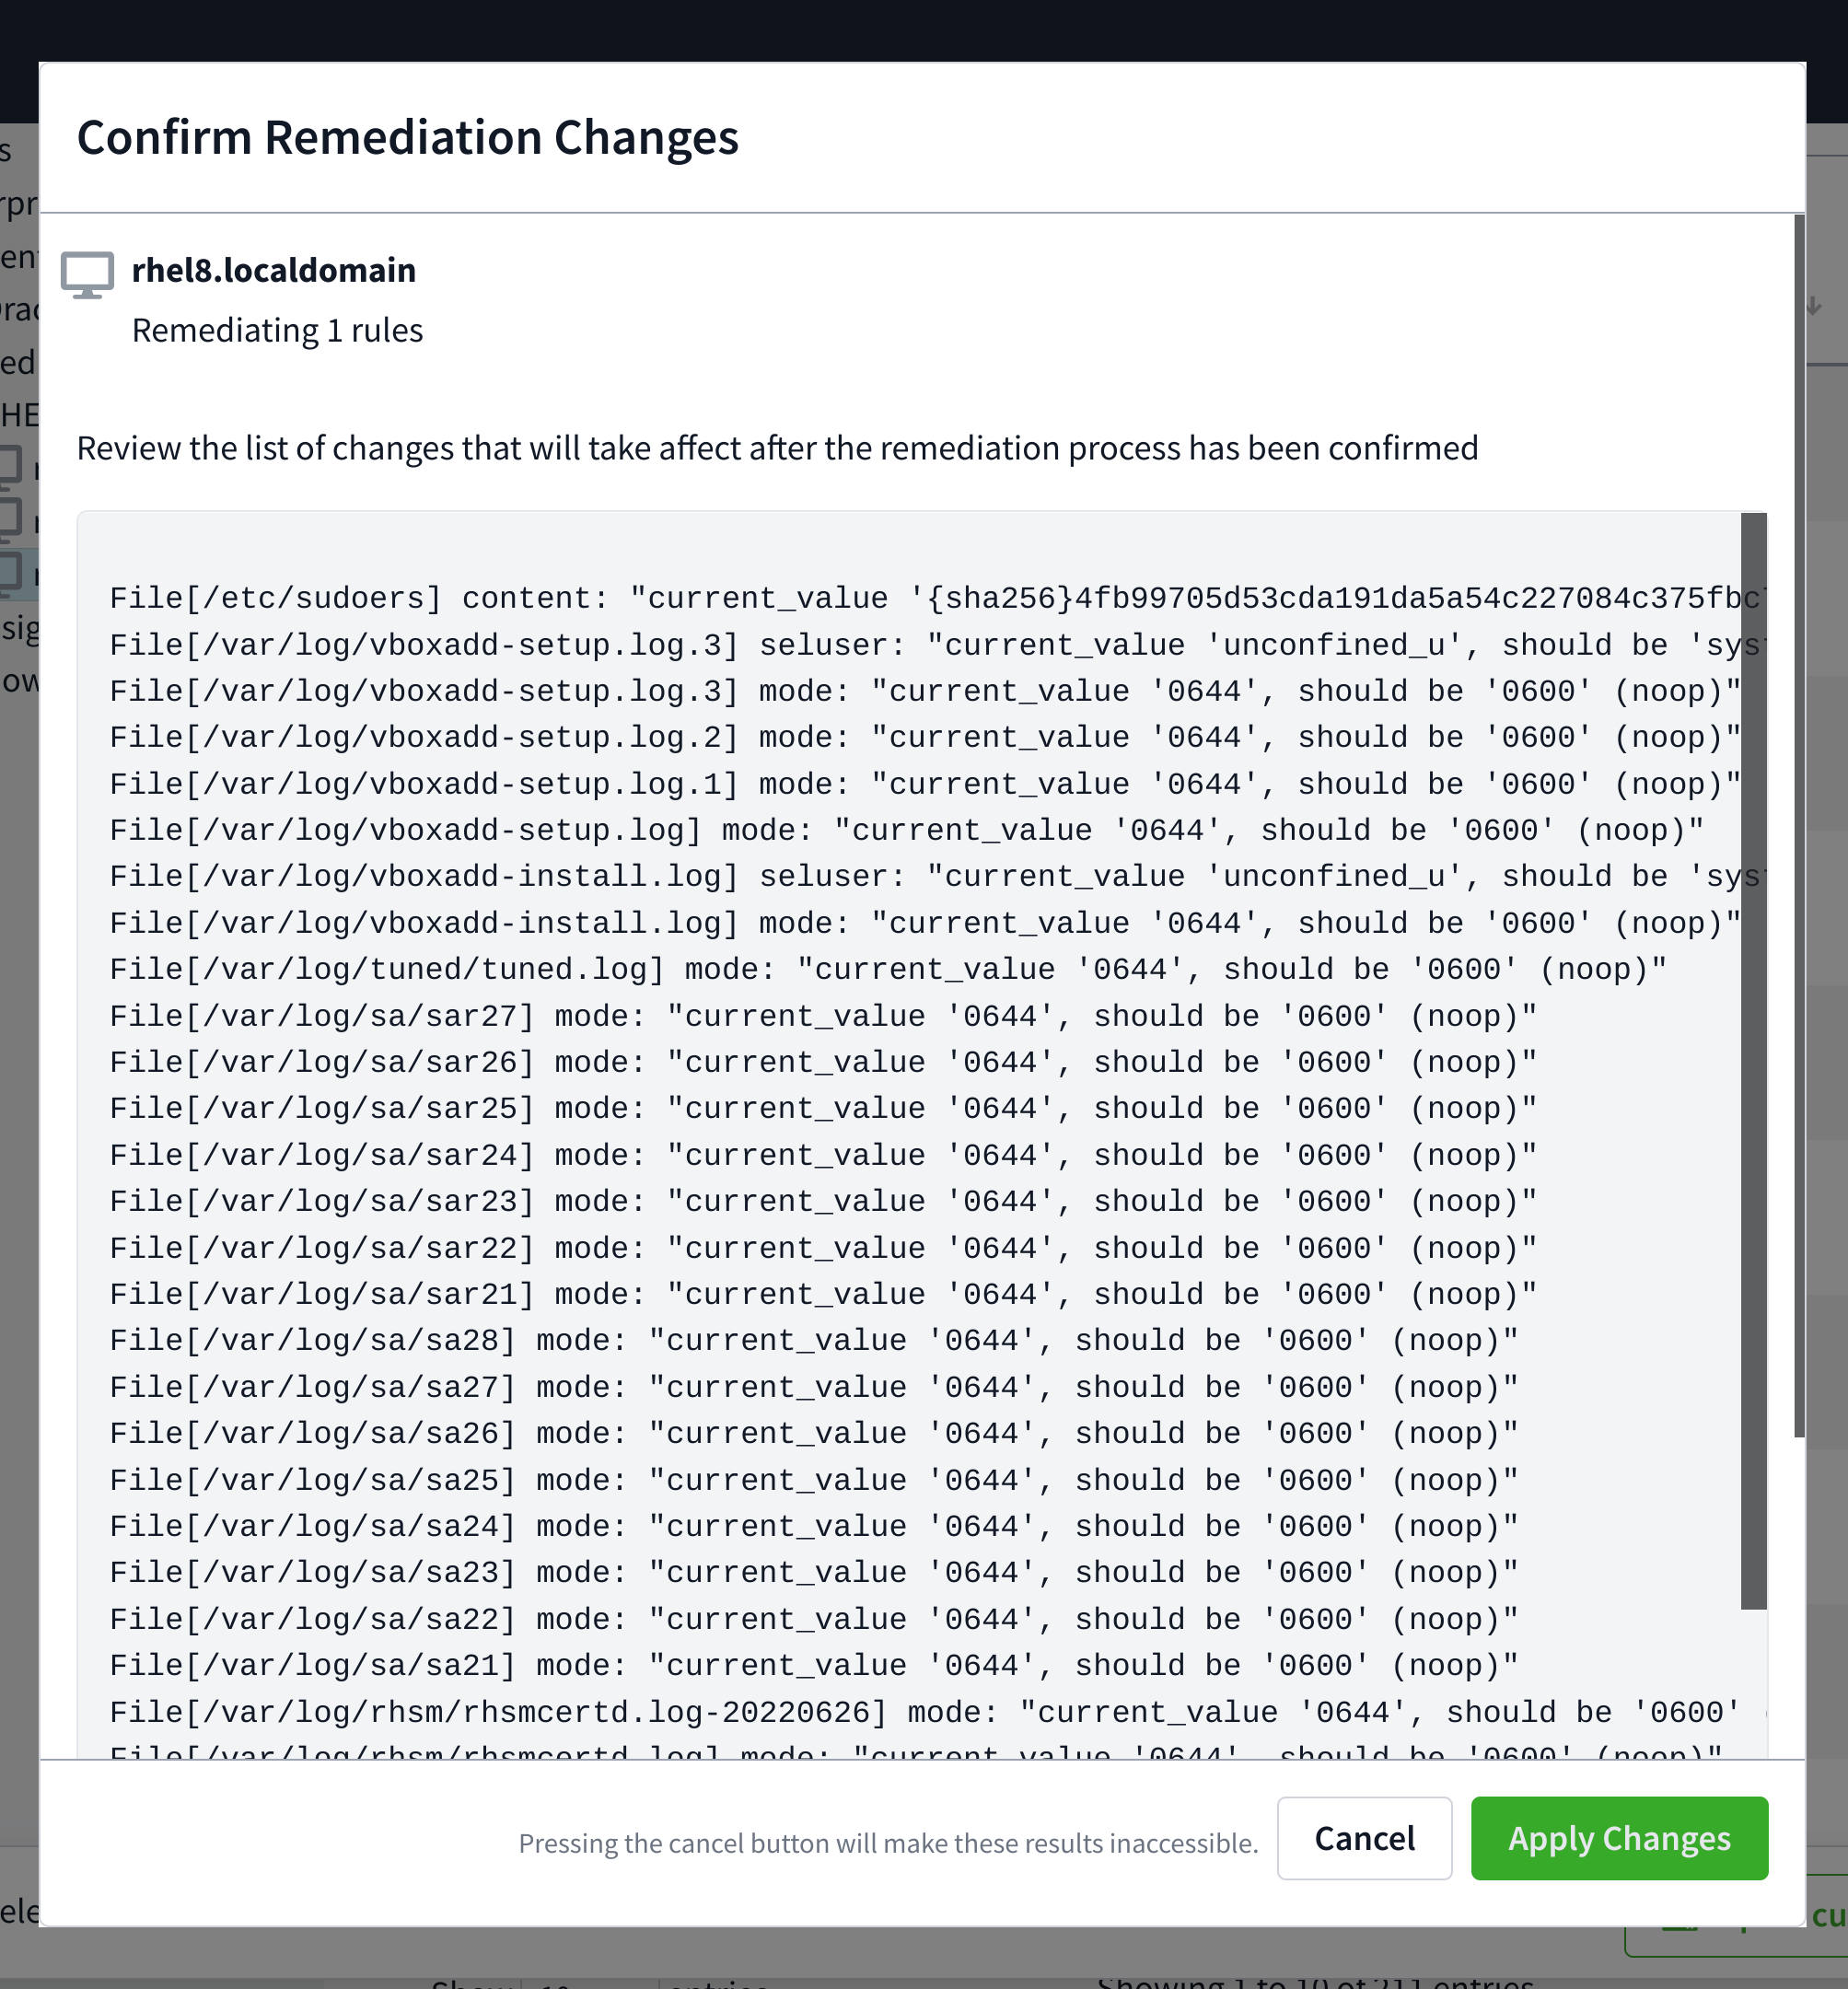
If all looks as to be expected, check the Trigger scan after changes are applied checkbox if desired and click Apply Changes.
Multiple rules can be fixed by using the checkboxes next to each rule displayed in the Scan Results tab on the Nodes page.
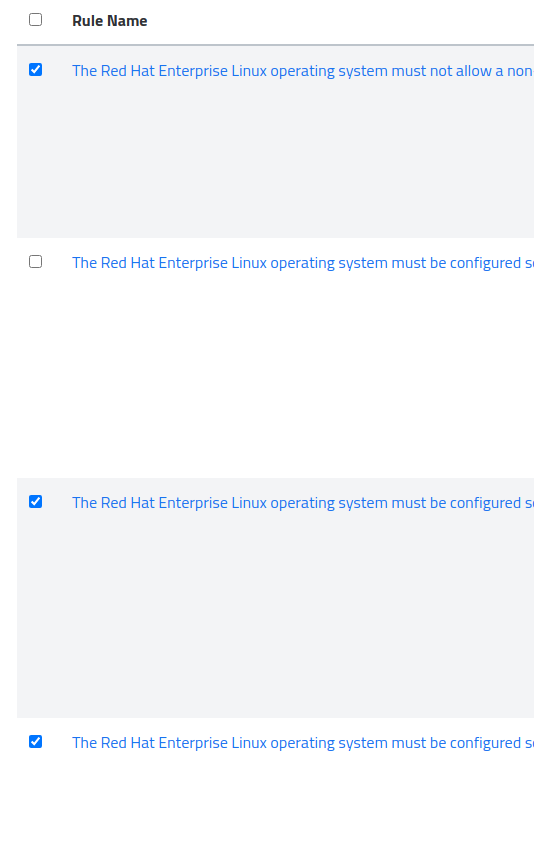
After selecting the all of the rules you wish to apply, an alert will appear on the bottom noting how many rules will be applied.

Clicking Remediate the selected checks will bring up the same review window as mentioned in Step 3.
Remediation across multiple nodes works identically to that of a single node. In order to begin, navigate through the node tree to the folder containing the nodes for remediation.
Next, select the appropriate platform and profile you wish to remediate against. For example, a STIG profile on Red Hat 7:

Select the check (or multiple checks) and remediate as you would a single node.
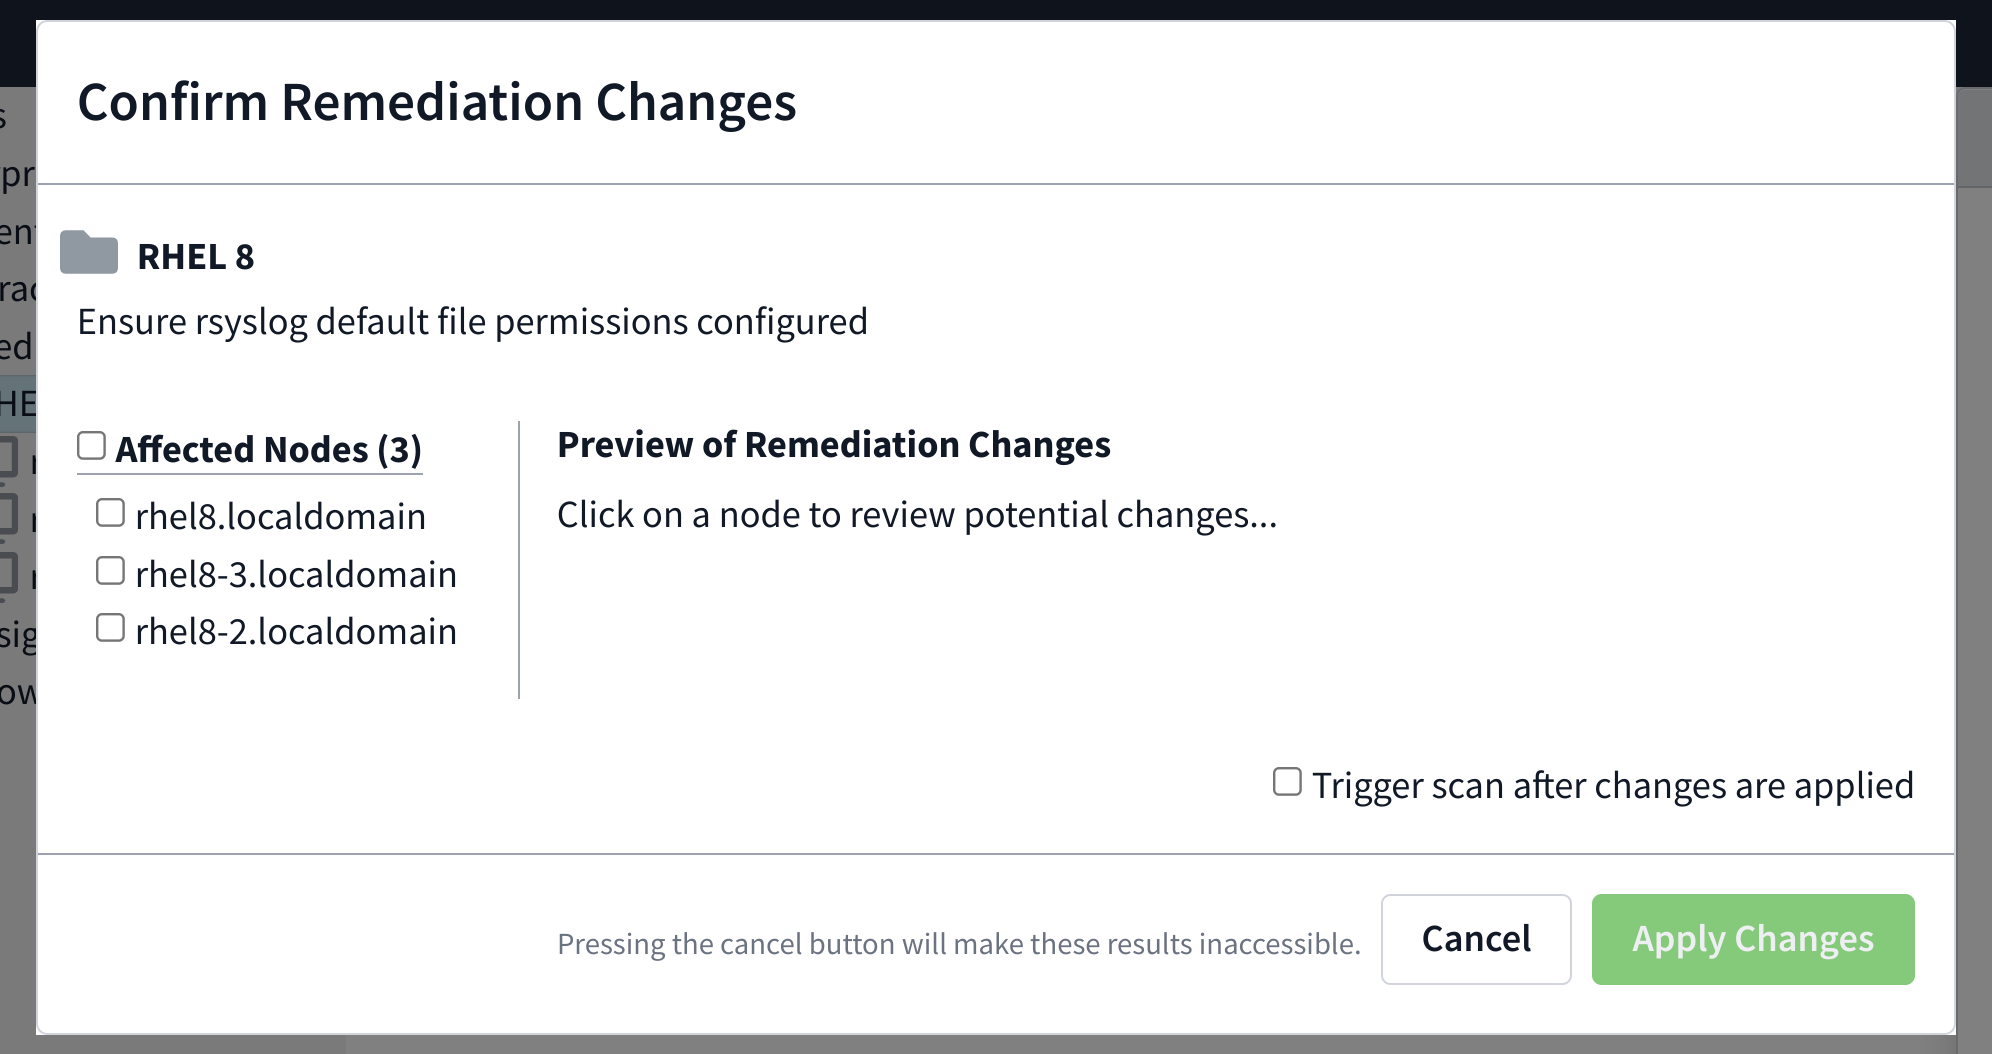
The changes can be previewed individually by clicking the node’s name on the side of the preview window. Once the changes have been previewed, check beside the nodes you’d like to take action on.
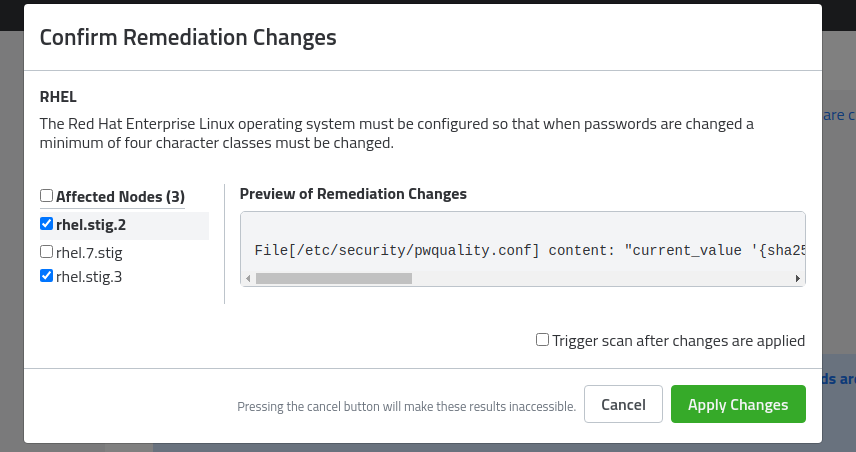
Click Apply Changes.
Sicura
© copyright 2022