Automatic compliance enforcement is one of the industry leading features the SIMP Console offers. Getting set up for enforcement is easy and can be accomplished in a few steps.
Assuming you have a fresh console and a node you wish to enforce compliance on, first go to the Infrastructure > Client Installation page via the sidebar navigation.
simp-agent register to begin the registration process. Follow the instructions on the Client Installation page.Be sure to select Enforce Compliance as an ability type in addition to the scanner you wish to use. For example:

Next, select the profile and benchmark you wish to use, either by following the interactive options during registration, or by specifying your own in simp-agent.yaml
The SIMP Agent can be started either in the foreground or in the background.
simp-agent run for foreground execution.simp-agent install and simp-agent start to start the agent as a service (Windows starts the agent as a service by default)From the console UI, trigger a scan either by clicking the Scan Now button or run simp-agent scan from the command line.
Verify that the scan completes with no errors and successfully submits its results to the console.
A single rule can be fixed by selecting the rule name in the results. This will open the Scan Drawer
Navigate to the Remediation tab, and click the Remediate button.
Once the changes are loaded, review what actions will be performed on the system.
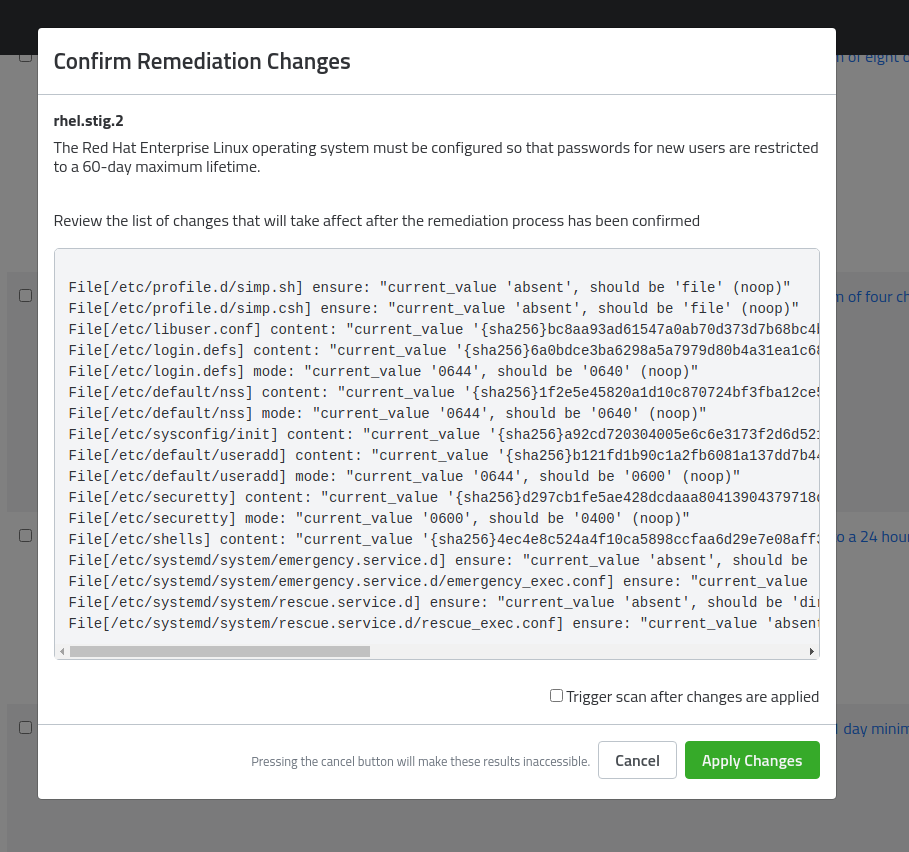
If all looks as to be expected, check the Trigger scan after changes are applied checkbox if desired and click Apply Changes.
Multiple rules can be fixed by using the checkboxes next to each rule displayed in the Scan Results tab on the Nodes page.
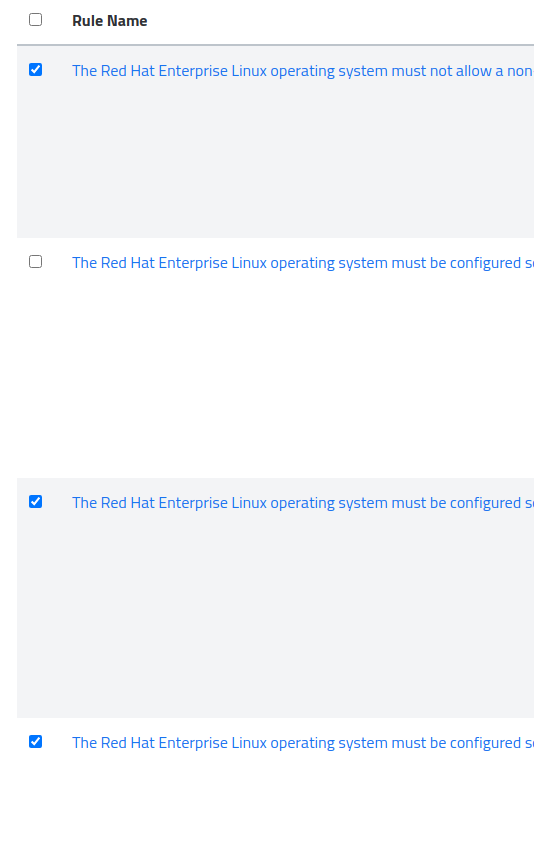
After selecting the all of the rules you wish to apply, an alert will appear on the bottom noting how many rules will be applied.

Clicking Remediate the selected checks will bring up the same review window as mentioned in Step 3.
Remediation across multiple nodes works identically to that of a single node. In order to begin, navigate through the node tree to the folder containing the nodes for remediation.
Next, select the appropriate platform and profile you wish to remediate against. For example, a STIG profile on Red Hat 7:

Simply select the check (or multiple checks) and remediate as you would a single node.
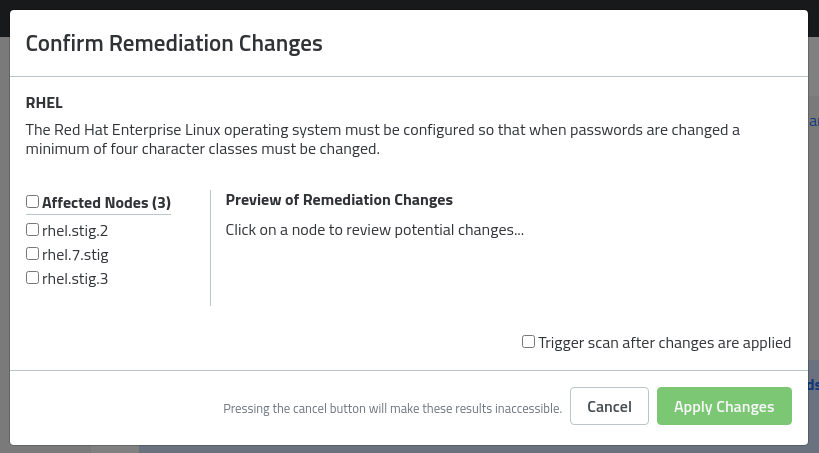
The changes can be previewed individually by clicking the node’s name on the side of the preview window. Once the changes have been previewed, check beside the nodes you’d like to take action on.
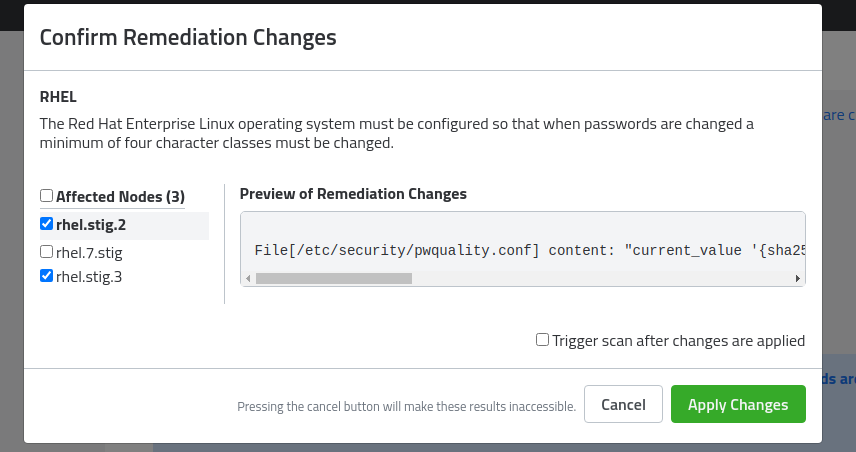
Click Apply Changes.
Currently there are a few checks that cannot be enforced using the SIMP Console enforcement methods and must be handled using a proper Puppet infrastructure running a full SIMP environment.
Checking any of these may result in the failure of the entire enforcement job.
Be sure when selecting multiple rules to not include the following:
### Red Hat Enterprise Linux 7 - The RHEL operating system must use a separate file system for /tmp (or equivalent).
- The Red Hat Enterprise Linux operating system must be configured so that users must provide a password for privilege escalation.

- Red Hat Enterprise Linux operating systems version 7.2 or newer with a Basic Input/Output System (BIOS) must require authentication upon booting into single-user and maintenance modes.

- The Red Hat Enterprise Linux operating system must use a separate file system for the system audit data path.

- The Red Hat Enterprise Linux operating system must implement certificate status checking for PKI authentication.   ### Red Hat Enterprise Linux 8
- RHEL 8 operating systems booted with a BIOS must require authentication upon booting into single-user and maintenance modes.
### Oracle Linux 7 - Oracle Linux operating systems version 7.2 or newer with a Basic Input/Output System (BIOS) must require authentication upon booting into single-user and maintenance modes.
- The Oracle Linux operating system must implement certificate status checking for PKI authentication.

- The Oracle Linux operating system must use a separate file system for /tmp (or equivalent).

- The Oracle Linux operating system must be configured so that users must provide a password for privilege escalation.
### Red Hat Enterprise Linux 7 / Oracle Linux 7 / CentOS 7 - Ensure sudo commands use pty
- Ensure rsyslog is configured to send logs to a remote log host

- Ensure permissions on SSH private host key files are configured
### Red Hat Enterprise Linux 8 / Oracle Linux 8 / CentOS 8 - Ensure sudo commands use pty
- Ensure rsyslog is configured to send logs to a remote log host

- Ensure bootloader password is set

- Ensure iptables service is not enabled with firewalld

- Ensure iptables default deny firewall policy

- Ensure iptables loopback traffic is configured

- Ensure iptables firewall rules exist for all open ports

- Ensure iptables is enabled and active

- Ensure iptables are flushed with nftables

- Ensure iptables default deny firewall policy

- Ensure iptables loopback traffic is configured

- Ensure iptables outbound and established connections are configured

- Ensure iptables firewall rules exist for all open ports

- Ensure iptables is enabled and active

- Ensure ip6tables default deny firewall policy

- Ensure ip6tables loopback traffic is configured

- Ensure ip6tables outbound and established connections are configured

- Ensure ip6tables firewall rules exist for all open ports

- Ensure ip6tables is enabled and active

- Ensure an nftables table exists

- Ensure nftables base chains exist

- Ensure nftables loopback traffic is configured

- Ensure nftables outbound and established connections are configured

- Ensure nftables default deny firewall policy

- Ensure nftables service is enabled

- Ensure nftables rules are permanent
Sicura
© copyright 2022